Viral Kunafa Chocolate Recipe – A Decadent Twist on a Classic Dessert
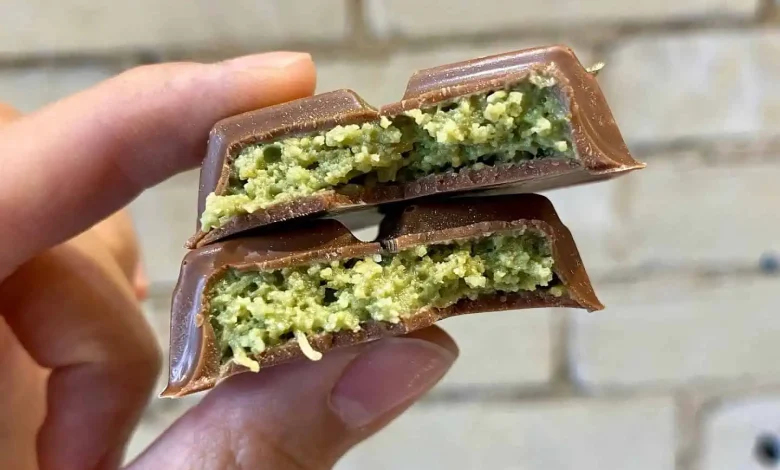
Kunafa, a beloved Middle Eastern dessert, is traditionally made with shredded phyllo dough, cheese, and a sweet syrup. But the latest viral food trend is Kunafa Chocolate—a rich, chocolatey twist on the classic, perfect for chocolate lovers. This easy chocolate kunafa recipe combines crispy golden pastry with a luscious chocolate filling, making it a showstopper for any occasion.
Whether you’re hosting a party, celebrating Eid, or just craving something indulgent, this chocolate kunafa dessert is guaranteed to impress. Follow this step-by-step guide to making the best chocolate kunafa at home!
Why This Chocolate Kunafa Recipe is Going Viral
- Rich and Decadent: A heavenly combination of crispy kunafa pastry and gooey melted chocolate.
- Easy to Make: Simple ingredients and step-by-step instructions for beginners.
- Perfect for Special Occasions: Ideal for festive gatherings, dinner parties, and celebrations.
- Customizable: Use milk chocolate, dark chocolate, or Nutella for different flavors.
Ingredients for Chocolate Kunafa
Here’s what you’ll need to make kunafa chocolate dessert:
For the Kunafa Crust:
- 250g kunafa dough (shredded phyllo pastry)
- 100g melted butter
- 2 tbsp sugar
For the Chocolate Filling:
- 200g dark or milk chocolate (chopped)
- ½ cup heavy cream
- 1 tbsp cocoa powder (optional for extra richness)
For the Sugar Syrup (Ater):
- ½ cup sugar
- ½ cup water
- 1 tsp lemon juice
- ½ tsp vanilla extract
Optional Toppings:
- Chopped pistachios
- Chocolate drizzle
- Whipped cream
Step-by-Step Instructions
Step 1: Prepare the Sugar Syrup
- In a saucepan, combine sugar and water over medium heat.
- Stir until the sugar dissolves, then bring to a simmer.
- Add lemon juice and cook for 5-7 minutes until slightly thickened.
- Remove from heat, add vanilla extract, and let it cool.
Step 2: Prepare the Kunafa Dough
- Preheat your oven to 180°C (350°F).
- In a large bowl, separate the kunafa strands and drizzle with melted butter.
- Mix well to coat all the strands evenly.
Step 3: Assemble the Kunafa Chocolate Layers
- Grease a round baking pan with butter.
- Spread half of the kunafa dough evenly into the pan, pressing it down firmly.
- In a separate bowl, heat heavy cream until warm (do not boil). Pour over chopped chocolate and stir until smooth.
- Pour the melted chocolate over the kunafa base.
- Cover with the remaining kunafa dough, pressing lightly to seal.
Step 4: Bake the Chocolate Kunafa
- Bake for 30-35 minutes until golden and crispy.
- Remove from the oven and immediately pour the cooled sugar syrup evenly over the kunafa.
Step 5: Garnish and Serve
- Let the kunafa rest for 10 minutes for the syrup to soak in.
- Garnish with chopped pistachios and drizzle with melted chocolate.
- Slice and serve warm for the best gooey chocolate experience!
Expert Tips for the Perfect Chocolate Kunafa
✔ Use Good Quality Chocolate: For a rich and smooth filling, opt for premium dark or milk chocolate.
✔ Butter Matters: Ensure the kunafa dough is well-coated with butter for the perfect crispiness.
✔ Don’t Skip the Syrup: The syrup balances the flavors and adds moisture to the kunafa.
✔ Serve Warm: Chocolate kunafa tastes best when warm, with the filling still gooey.
Frequently Asked Questions
1. Can I Make Chocolate Kunafa Without an Oven?
Yes! Cook it on a stovetop over low heat in a greased pan, covering with a lid, and flipping it halfway through.
2. Can I Use Nutella Instead of Chocolate?
Absolutely! Spread a generous layer of Nutella for a quick and delicious version.
3. How Do I Store Leftover Chocolate Kunafa?
Store it in an airtight container in the fridge for up to 3 days. Reheat in the oven for a crispy texture.
Conclusion
This viral chocolate kunafa recipe is a must-try dessert for chocolate and Middle Eastern food lovers. With its crispy golden crust, gooey chocolate center, and sweet syrup, it’s the ultimate indulgence. Try this recipe today and impress your family and friends with a rich, chocolatey twist on the classic kunafa!
Loved this recipe? Share your creations and tag us on social media!

